SAP HANA cockpit is a comprehensive tool that unifies individual, multiple, and tenant database management. It replaces both the SAP DB Control Center and the SAP HANA cockpit that were available with SAP HANA 1.0. SAP HANA cockpit 2.0 can be used with systems running SAP HANA 2.0 and SAP HANA 1.0 SPS 12.
System requirement
Starting with SAP HANA cockpit SP 07, its persistence can be installed in an existing SAP HANA 2.0, enterprise edition system. In this scenario, the cockpit install program creates a new tenant database, COCKPITDB, to act as the persistence to store all metadata needed by the cockpit. SAP recommends the following guidelines for memory and disk space:
- Host memory: minimum 22 GB.
- Disk space: minimum 1.5 GB + 2 MB per 100 registered resources.
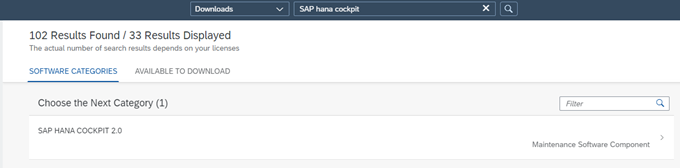
Download latest version
Search “SAP hana cockpit” on sap software download and choose “SAP HANA COCKPIT 2.0”
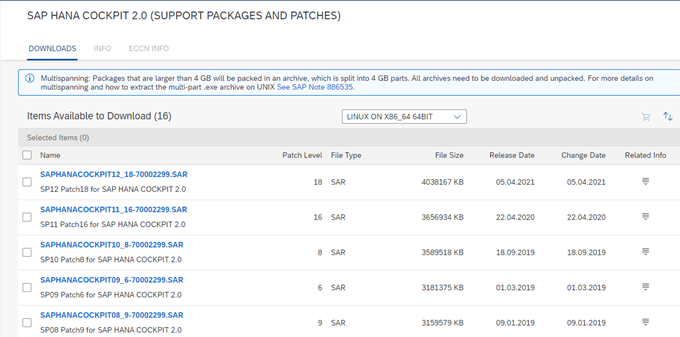
Select your OS and download the latest available SP and Patch level.
Uncar the SAR file to a local directory on your HANA db server using below command:
SAPCAR -manifest SIGNATURE.SMF -xvf SAPHANACOCKPIT<version number>.SAR
Installation
Login as root user and make sure the root user has read and execute authorization on the local directory where we extracted the data from SAR file.
To start the installation we need to execute below command:
./hdblcm.sh
You get option to install a new HANA cockpit system or you can install on an existing hana system.
For Production environment, it’s recommended to install hana cockpit on a separate server to avoid overloading of the Production environment. Also another benefit would be if the production server on which the hana cockpit was installed is itself down then you won’t be able to monitor other systems via hana cockpit.
Pre-requisite: To install it on an existing hana system, you would need the SYSTEM user password for both SYSTEMDB as well the tenant databases. So keep it ready before starting the installation. If SYSTEM user is disabled, then enable it using HANA Studio.
In below example, we are going to install it over an existing test hana system.

During installation of XS advanced, you have to select one of the following routing modes, which has an influence on the URLs by which applications are exposed.
Routing Modes
Important Note: Changing the routing mode after installation is not supported!
Port-based Routing Mode
In this setup, applications and services are distinguished using different ports while sharing the same domain name, for example:
- https://example.org:51000
- https://example.org:51001
This allows using a single non-wildcard DNS entry for all application and platform endpoints.
Note, that browsers share cookies among all endpoints below a particular domain. Thus, one application might “see” cookies set by another application. Hence, from a security point of view, port-based routing mode is not recommended for productive use.
Hostname-based Routing Mode
In this setup, applications and services are distinghuised using different sub-domains (aka hostnames) on a single port, for example:
- https://application1.example.org
- https://application2.example.org
In this mode, browsers don’t share cookies amongst different domains. Thus, from a security point of view, hostname-based routing mode is the setup recommended for productive use.
To allow the XS advanced Platform Router to dispatch requests to these URLs to the target application, a wildcard DNS entry is required for the XS advanced default domain, for example:
example.org IN A 10.10.10.10
*.example.org IN CNAME example.org
In this example, the default domain “example.org” is mapped to the IP address 10.10.10.10, which would be the the SAP HANA host running the ‘xscontroller’ and ‘xsuaaserver’ services.

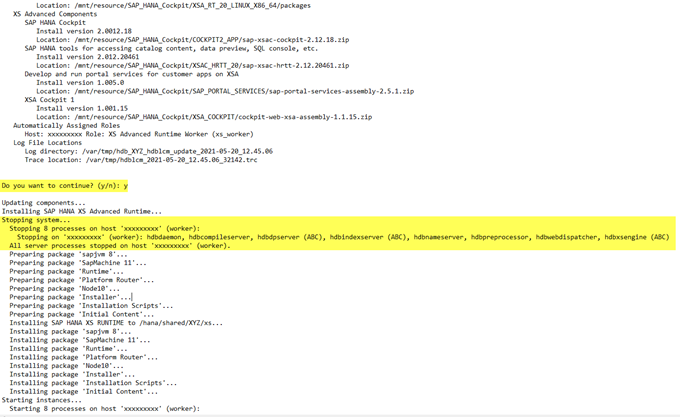
After entering all the parameters, setup will give an overview and ask if you want to continue. Verify everything and then enter “y”. If you feel that you want to change something then press “n” for No and start the setup again using ./hdblcm.sh
Once you press “y”, installation will start and it will first stop all the services on your hana database. So you will need a downtime of around 1-2 hours for it to get finished.
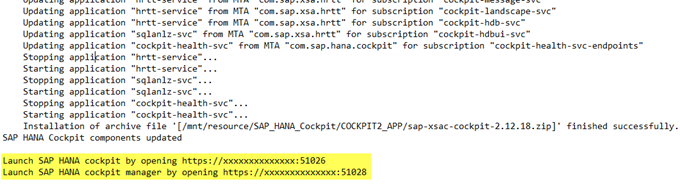
At the end of the installation, it will provide you 2 URLs to access SAP HANA cockpit and cockpit manager.
Post Installation steps
For the first time use, we need to do some basic setup. Open the SAP HANA cockpit manager URL and login with user COCKPIT_ADMIN which is ideally created by default and use the Master password which was provided during the installation. In some cases, it may not exist, so you may login using XSA_ADMIN user and the master password.
Once you are logged in, you can create another cockpit user to provide access.

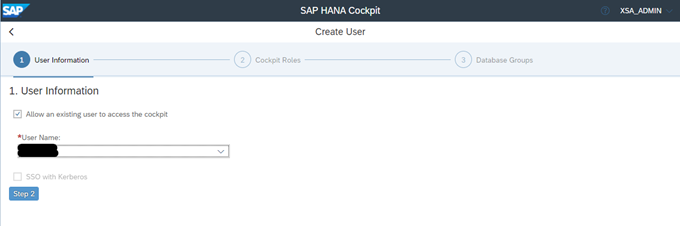
Assign all the required roles for administrator

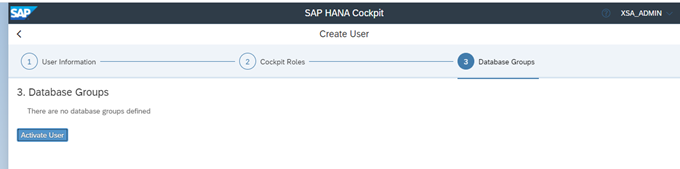
Current we don’t have any database groups, but can be created at a later stage.
Click on “Activate User”.
You may even create a dedicated user like COCKPIT_ADMIN using this menu.
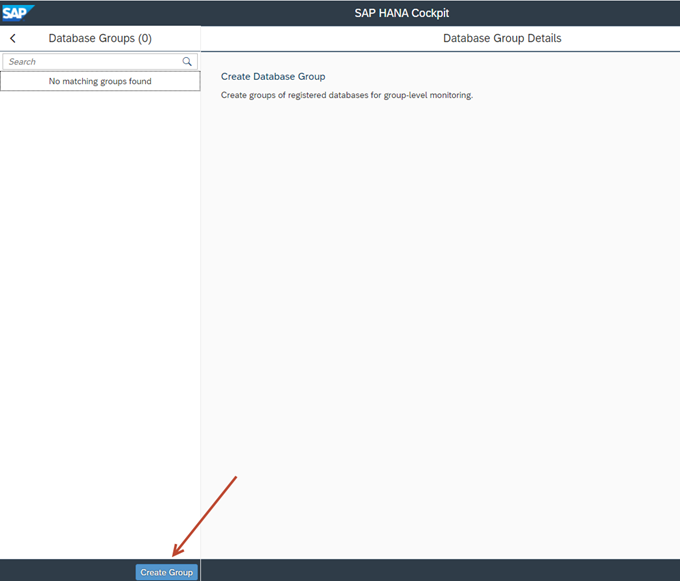
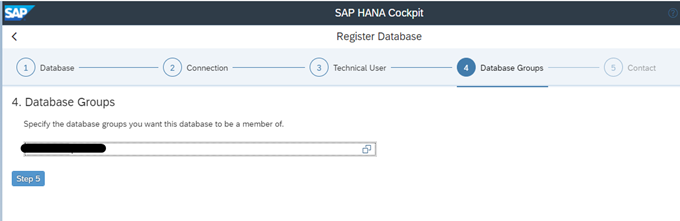
Now to add database to hana cockpit, we first need to configure “Database Groups”.
Click on “Create Database Group” button
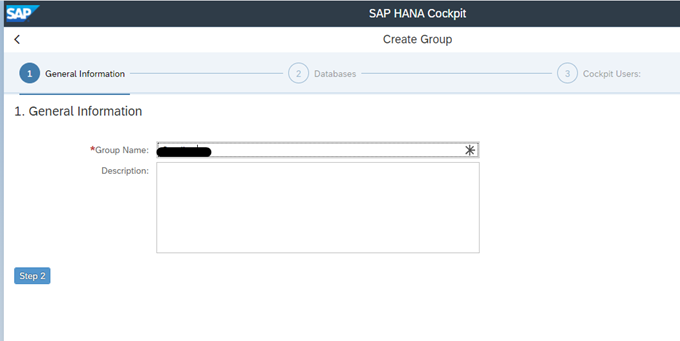
Enter the Group Name like ECC, SCM, GRC etc and Description (Optional)
As currently we don’t have any registered database yet, so we will select option “Register databases after the group is created”.
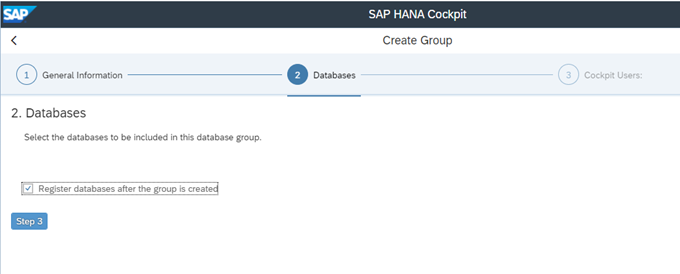
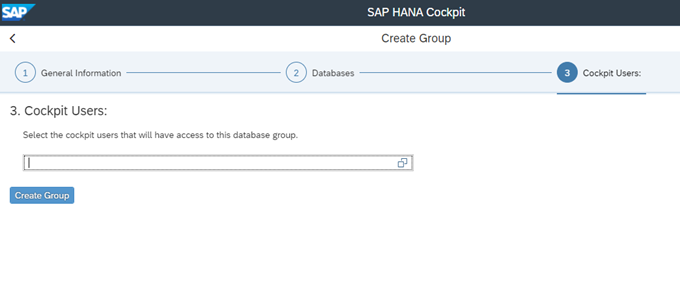
Add the users to which you want to give access to and click on “Create group”
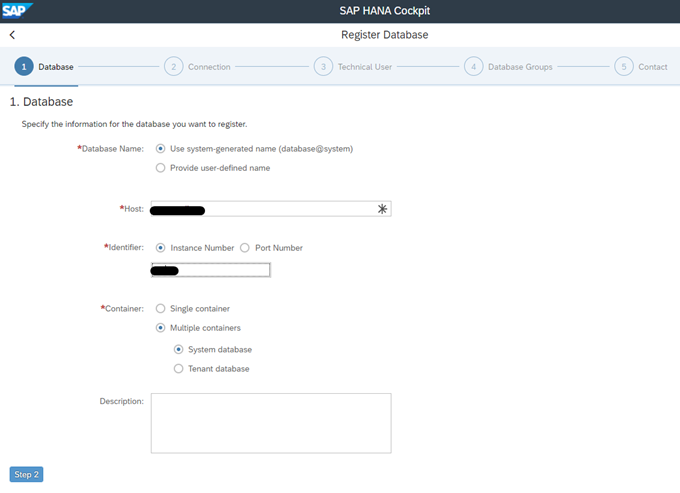
The next step would be to “Register Database”.
Enter the details for the required database which you want to register in SAP HANA Cockpit.
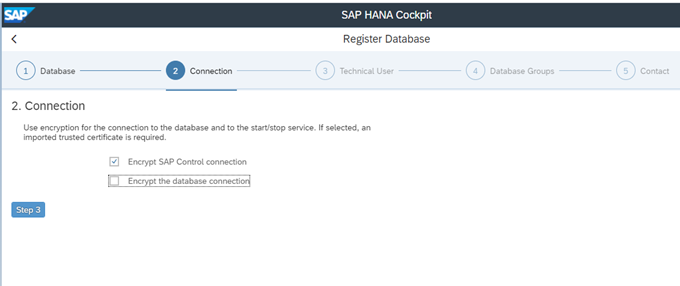
Select the encryption options available for the connection to the database and to the start/stop service.
Enter user/password required to connect to SYSTEMDB

Select the “Database group” which we just created in above steps
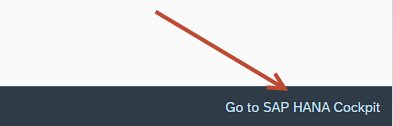
Now open the SAP HANA cockpit, to check more information on the added database. On Cockpit manager, you should see a button to open SAP hana cockpit.
SAP HANA Cockpit will open as Fiori application with below multiple default tabs.

Refer below SAP blogs or notes for more information:
SAP HANA Cockpit Installation and Update Guide
2245631 – Routing Mode and Default Domain configuration for SAP HANA extended application services, advanced model
https://blogs.sap.com/2017/12/14/sap-hana-2.0-cockpit-installation-and-configuration-how-to-guide/
Hello
Many Thanks
I installed my HANA Cockpit on a server where the productive SAP ABAP application server is running.
Is one installation like that, recommended by SAP? Can any problems arise with such an installation?
Many thanks
Hi Adam,
Thanks for your comment.
It is highly recommended to install HANA Cockpit on a separate server. If you install it on a server where you have a productive instance running, then it may cause some performance issues as CPU and RAM will need to be shared between these 2 applications (Hana cockpit and ABAP application server). I would rather recommend installing the HANA cockpit on a Development server (if a separate server is not feasible). Let me know if you have any further queries.
Regards,
SAPissues.com
This post is extremely radiant. I extremely like this post. It is outstanding amongst other posts that I’ve read in quite a while. Much obliged for this better than average post. I truly value it!